


EXPLORE NEW HORIZONS
View all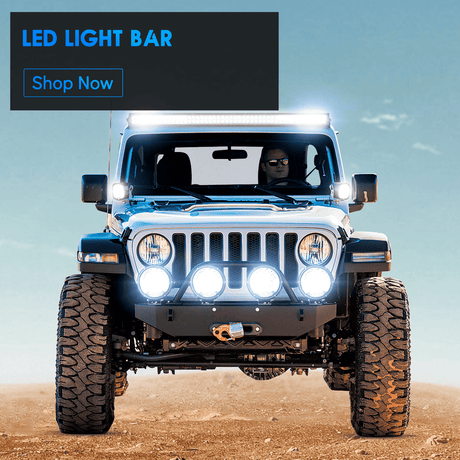
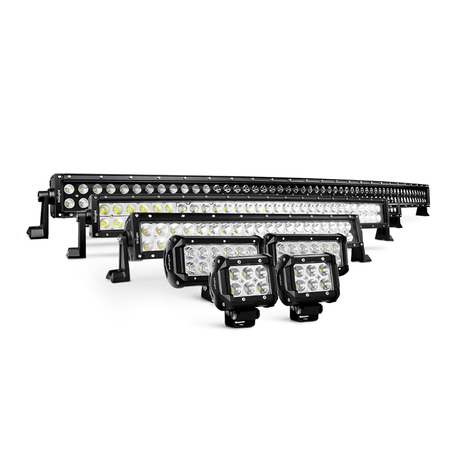
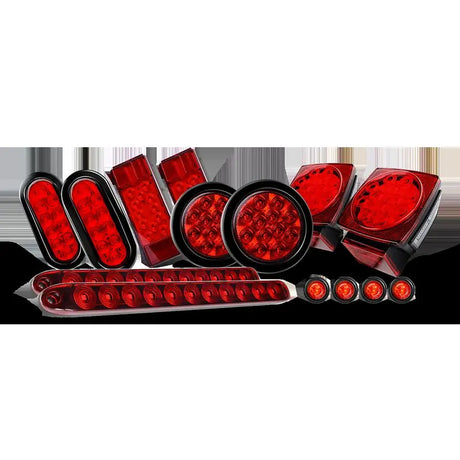
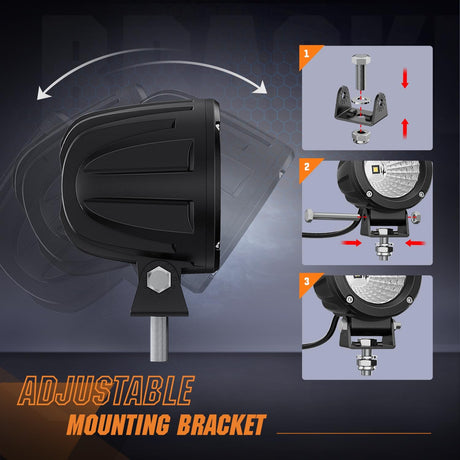
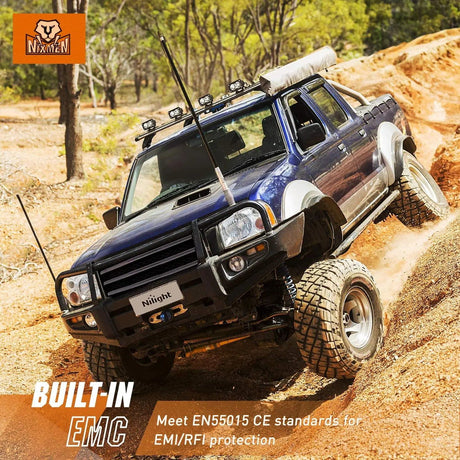
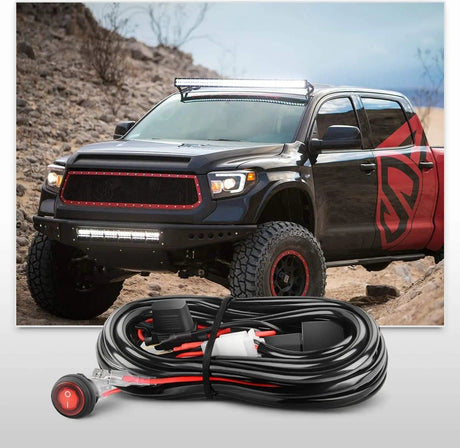
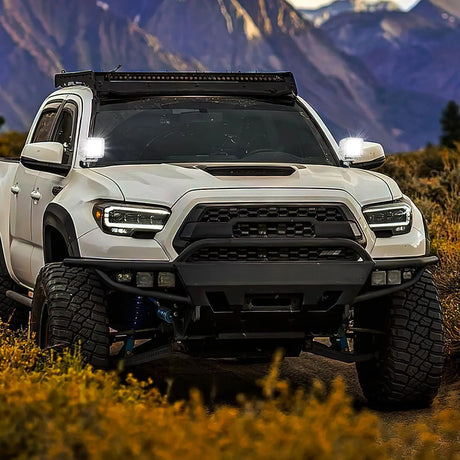
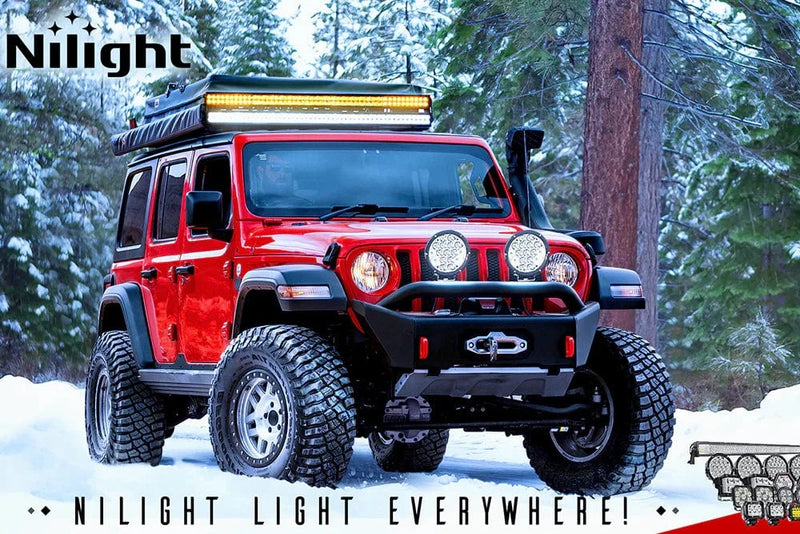
Level up Your Off-road
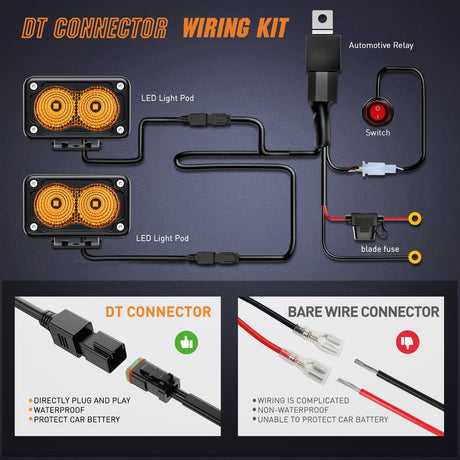
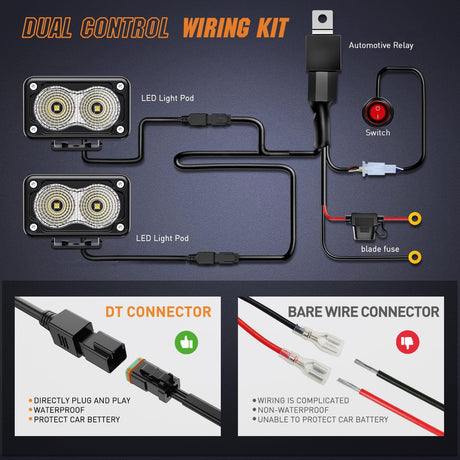
A wide selection of light bars, light switch, LED grilles, light mounts and wiring accessories.
-
10% off
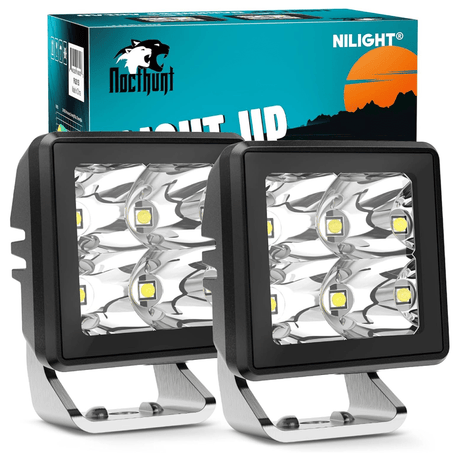
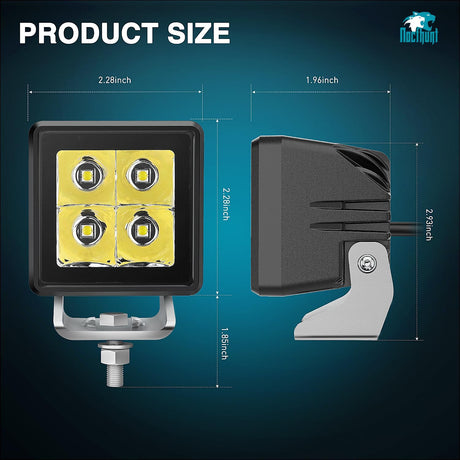
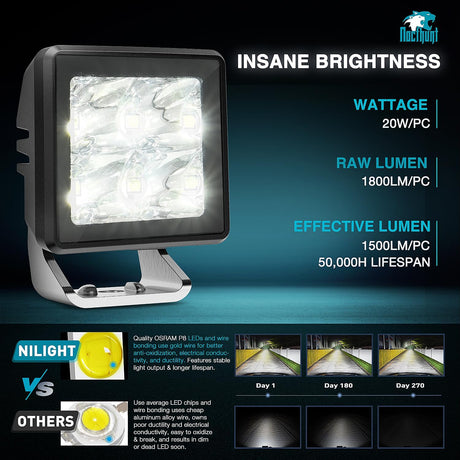
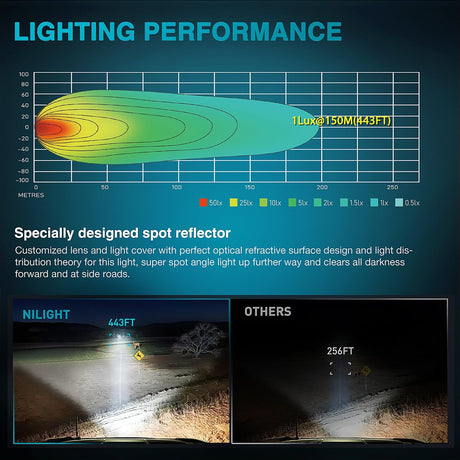
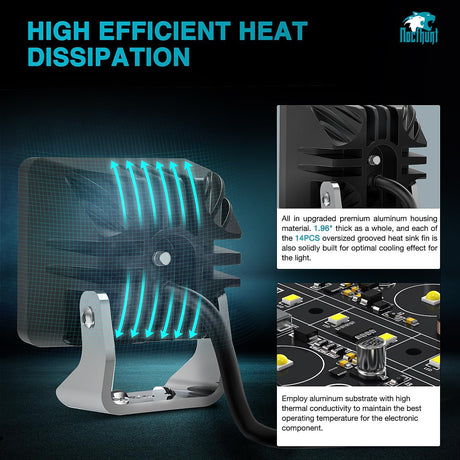
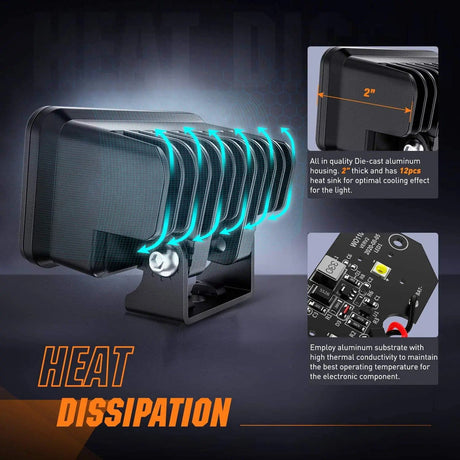
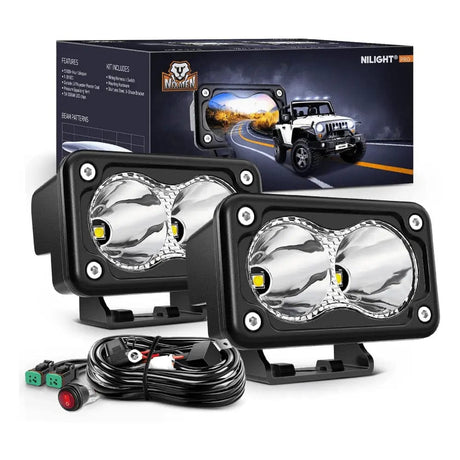
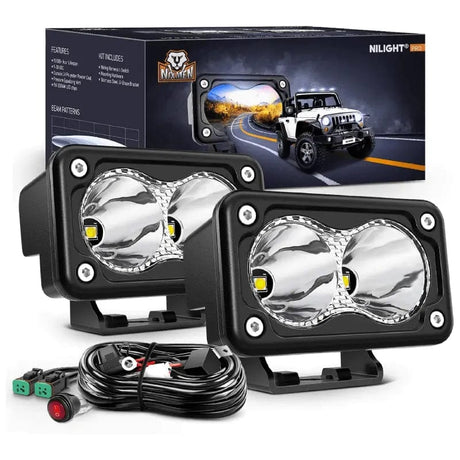
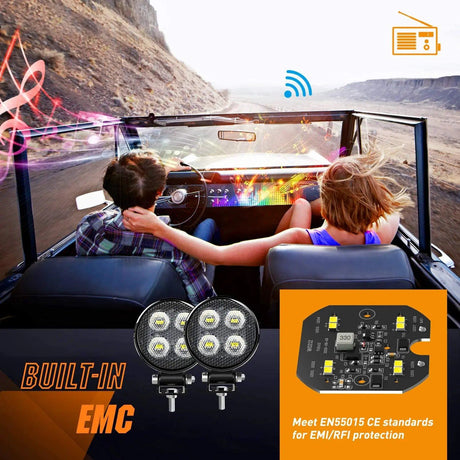
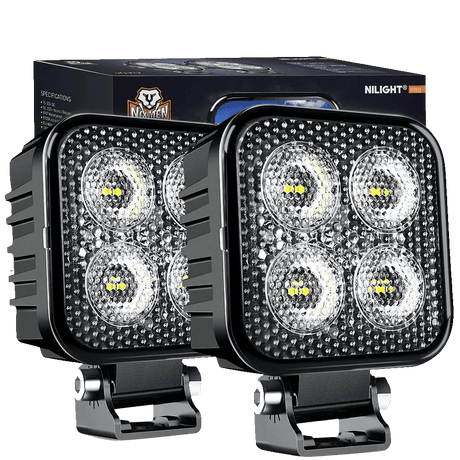
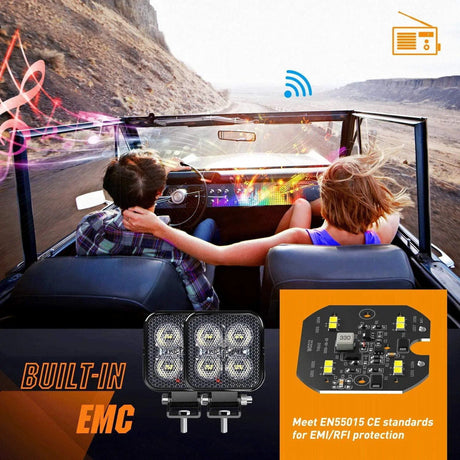
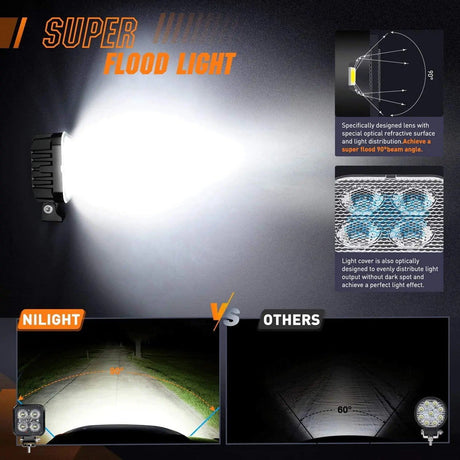
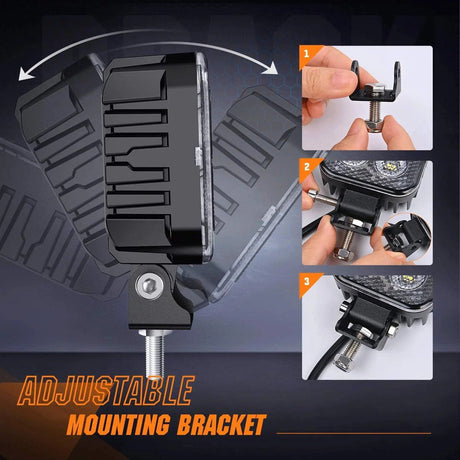
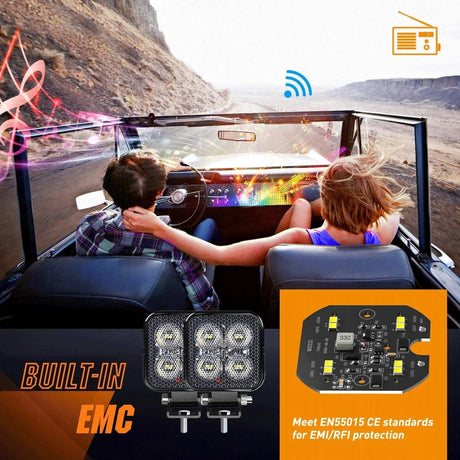
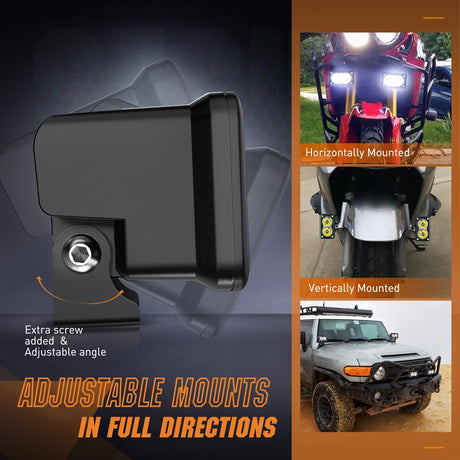
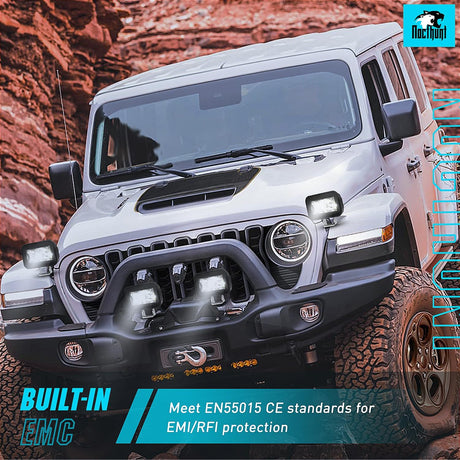
2 Inch 4LED 20W Square Spot Built-in EMC LED Pod Lights (Pair)
$34.19$37.99Unit price /Unavailable -
-
Sold out
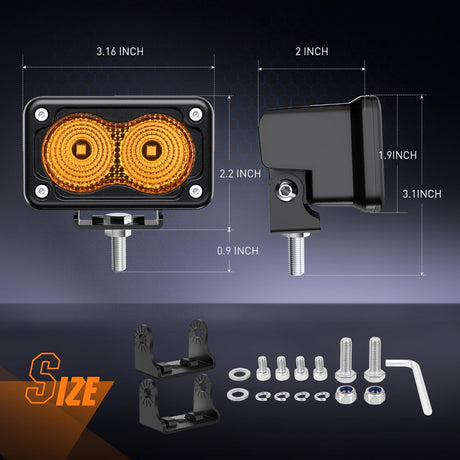
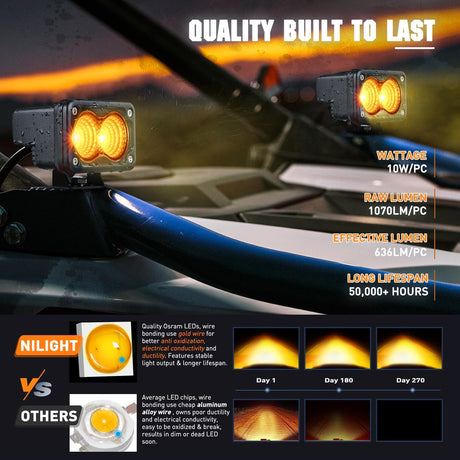
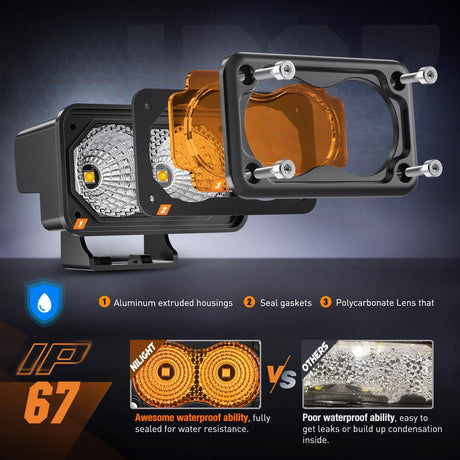
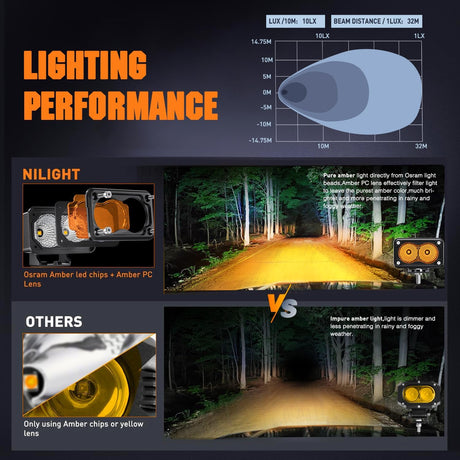
3 Inch 1070LM Amber DRL Flood LED Pods (Pair) | 18AWG DT Wire
$49.99Unit price /Unavailable -
-
-
-
-
-
10% off
3 Inch 10W 1080LM Flood Round Built-in EMC LED Work Lights (Pair) | 18AWG DT Wire
$62.99$69.99Unit price /Unavailable -
-
Sold out
3 Inch 10W 1160LM Flood Built-in EMC LED Work Lights (Pair) | 18AWG DT Wire
$49.99Unit price /Unavailable -
-
-
-
3 Inch 10W 1300LM Spot Built-in EMC LED Work Lights (Pair) | 16AWG DT Wire
$49.99Unit price /Unavailable -
-
3 Inch 10W 2360LM Amber Spot Built-in EMC LED Work Lights (Pair)
$35.99Unit price /Unavailable -
-
3 Inch 10W 800LM Amber Round Built-in EMC LED Pods (Pair)
$69.99Unit price /Unavailable -
-
-
-
3 Inch 12W 1500LM Round Flood Built-in EMC LED Work Lights (Pair) | 16AWG DT Wire
$47.99Unit price /Unavailable -
-
-
-
3 Inch 12W 1500LM Square Flood Built-in EMC LED Work Lights (Pair) | 16AWG DT Wire
$47.99Unit price /Unavailable -
-
3 Inch 12W 2940LM Amber Round Flood Built-in EMC LED Work Lights (Pair)
$33.99Unit price /Unavailable -
-
3 Inch 15W 1550LM Spot Round Built-in EMC LED Work Lights (Pair) | 16AWG DT Wire
$62.99Unit price /Unavailable -
-
3 Inch 15W 2100LM Square Amber Flood Built-in EMC Led Work Lights (Pair)
$33.99Unit price /Unavailable -
-
Sold out
3 Inch 20W 1160LM Flood Built-in EMC LED Work Lights (Pair)
$29.99Unit price /Unavailable -
-
20% off
3 Inch 20W 1240LM Amber DRL Flood Cube LED Pods (Pair) | 16AWG DT Wire
$56.22$69.99Unit price /Unavailable -
-
10% off
3 Inch 20W 2200LM DRL Spot Cube LED Pods (Pair) | 16AWG DT Wire
$67.49$74.99Unit price /Unavailable -
-
10% off
3 Inch 2LED 10W Square Flood Built-in EMC LED Pod Lights (Pair)
$26.99$29.99Unit price /Unavailable -
-
Sold out$54.99Unit price /Unavailable
-
-
3 Inch 42W Spot Flood Combo White Case Led Work Lights (Pair)
$28.99Unit price /Unavailable -
-
3 Inch 42W Spot Flood Square LED Pods (Pair) | 16AWG Wire 3Pin Switch
$37.99Unit price /Unavailable -


Window Regulator
Nilight, your premier choice for window regulators, popular part type and come in cable and rigid, or scissor, designs.
Autos Repair Tool
Explore a wide range of our Auto Body Repair Tools selection. Find top itemss, exclusive offers, and unbeatable prices
Popular Departments


New Arrival
View all-
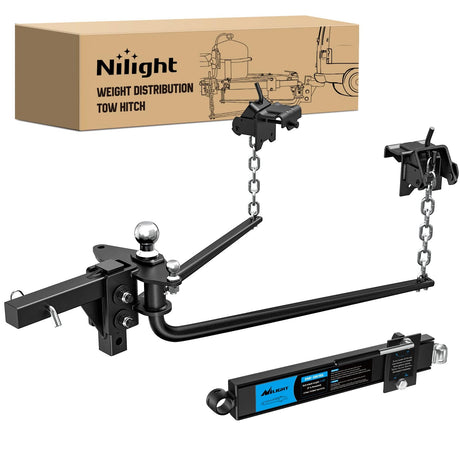
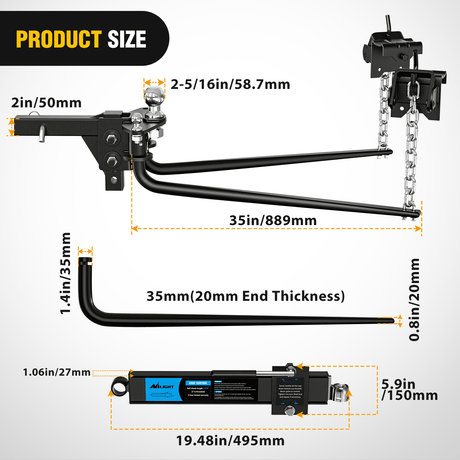
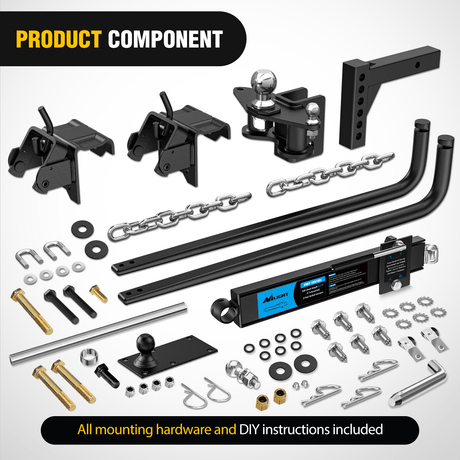
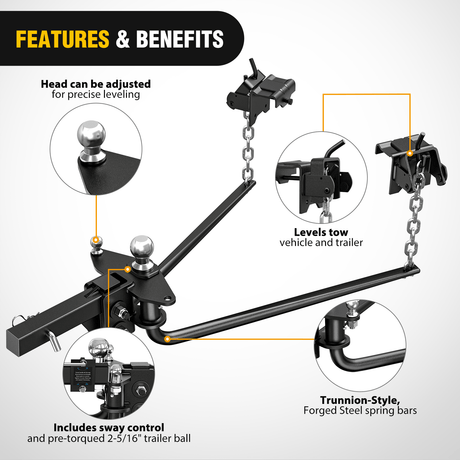
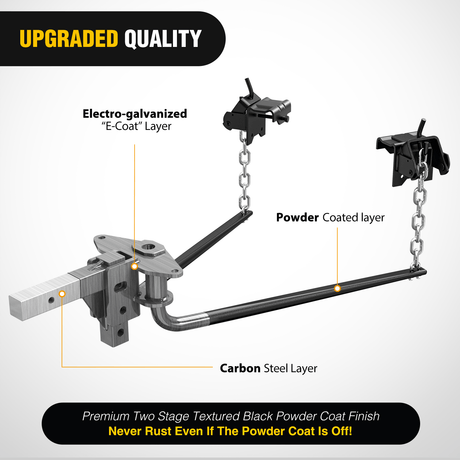
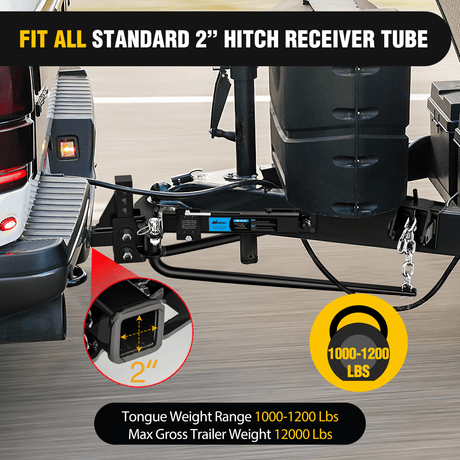
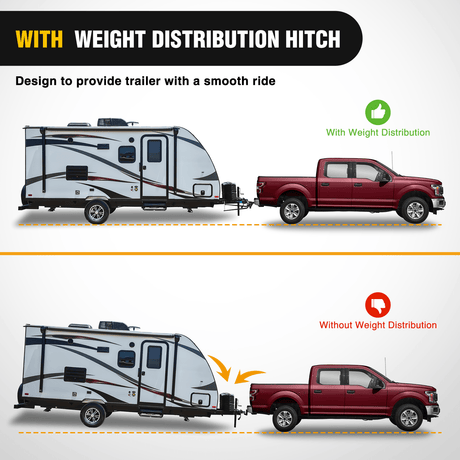
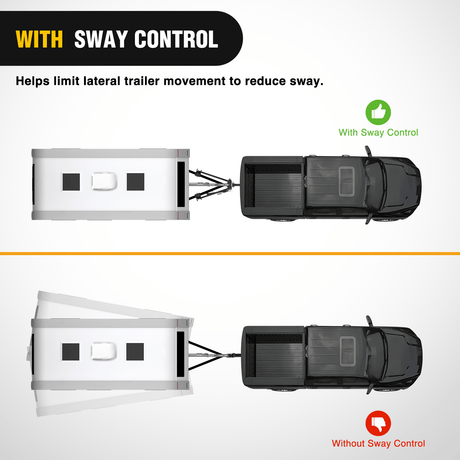
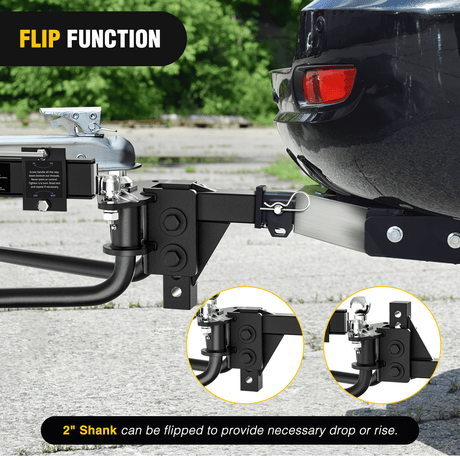
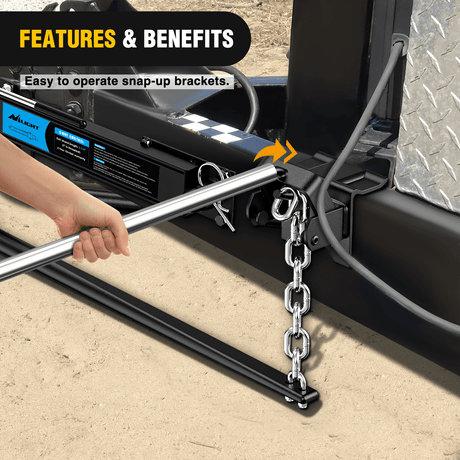
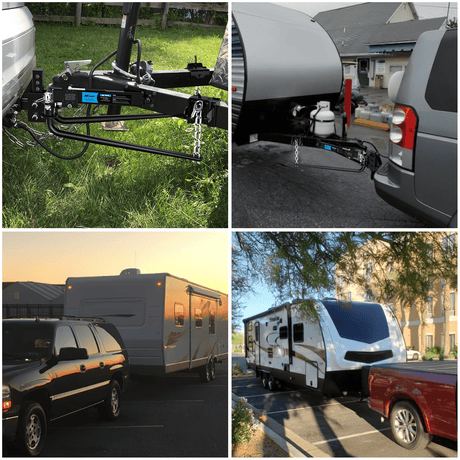
1000 lbs Round Bar Weight Distributing Hitches Kit
$282.95Unit price /Unavailable -
-
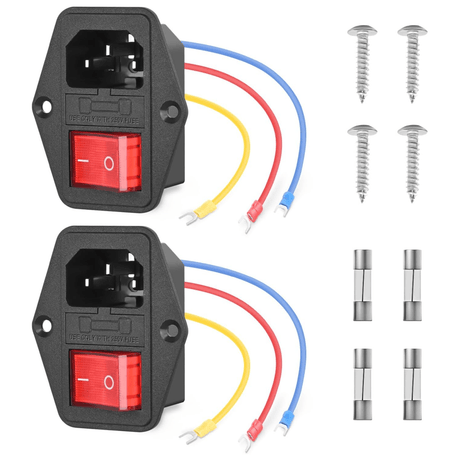
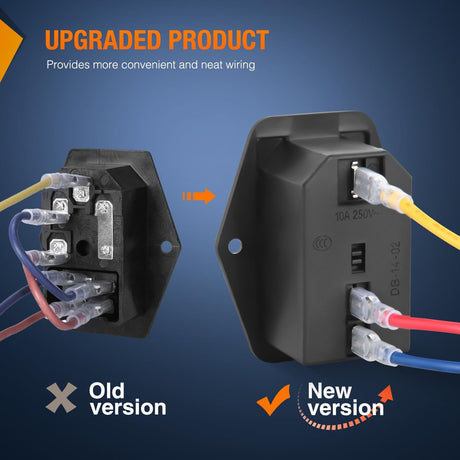
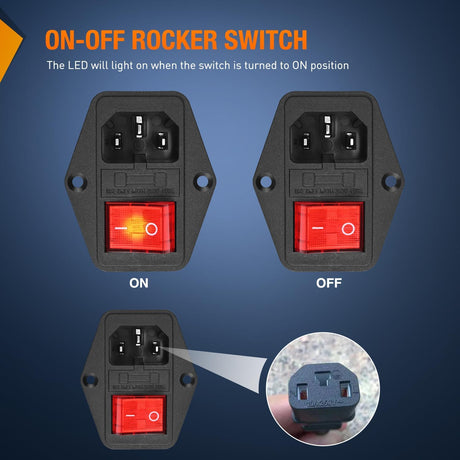
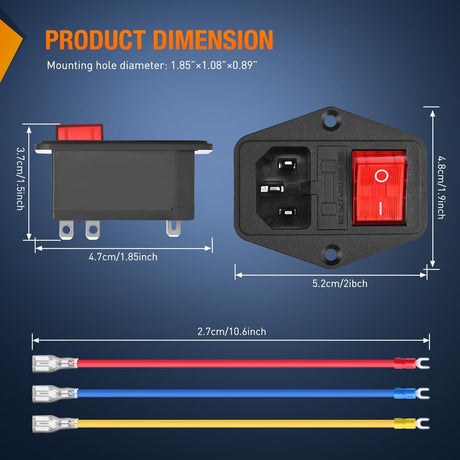
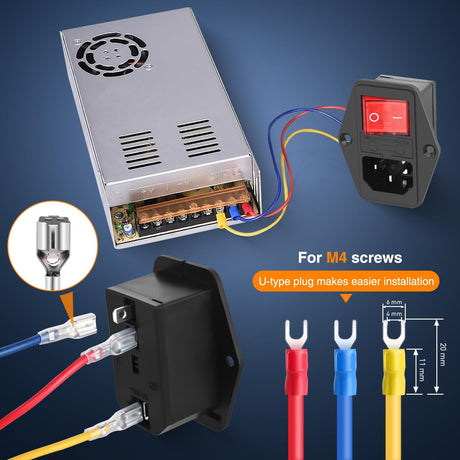
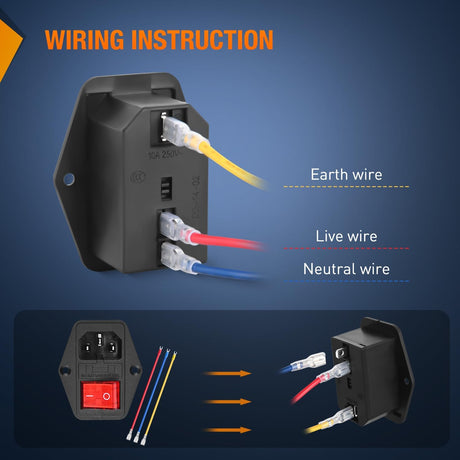
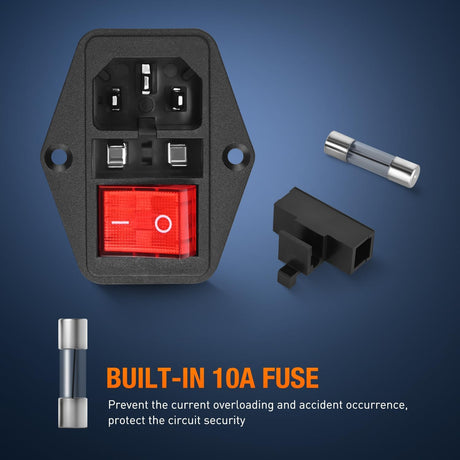
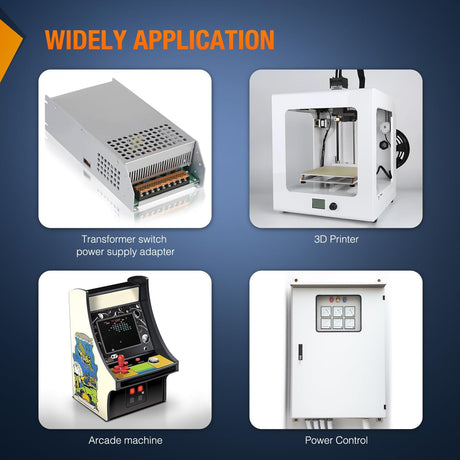
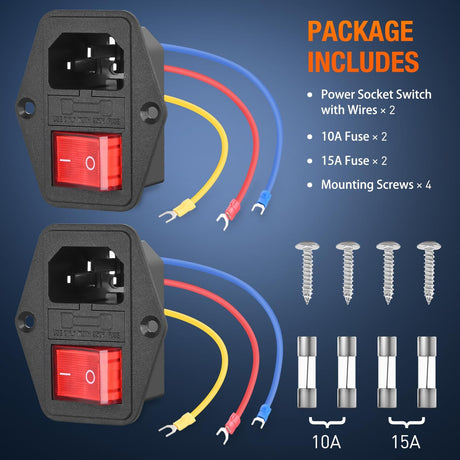
10A 250V AC Power Socket Inlet
$10.99Unit price /Unavailable -
-
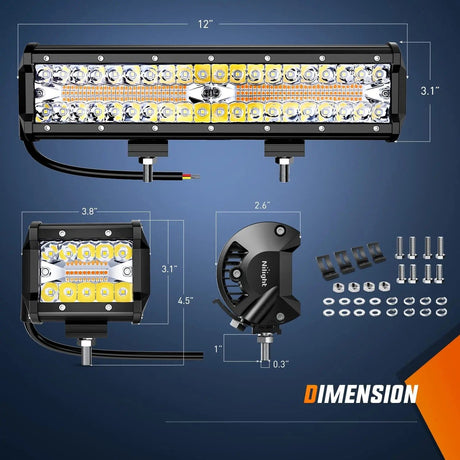
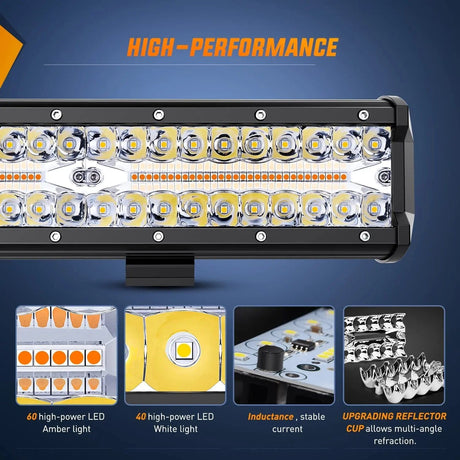
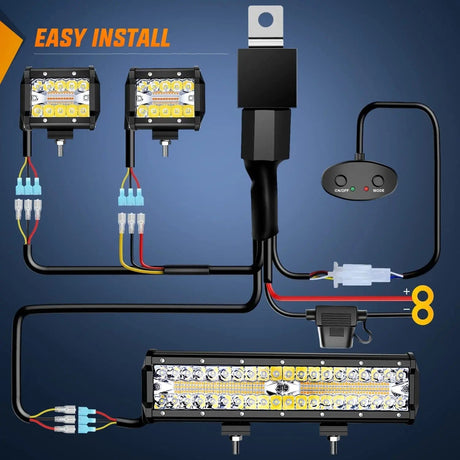
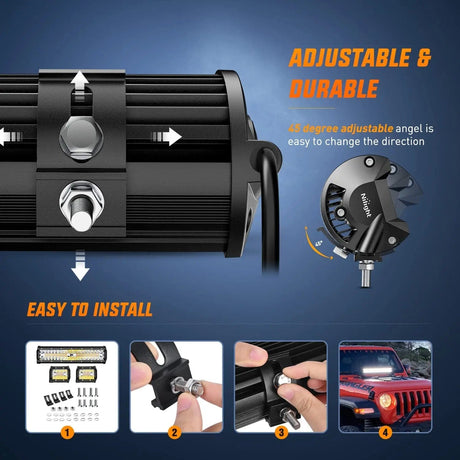
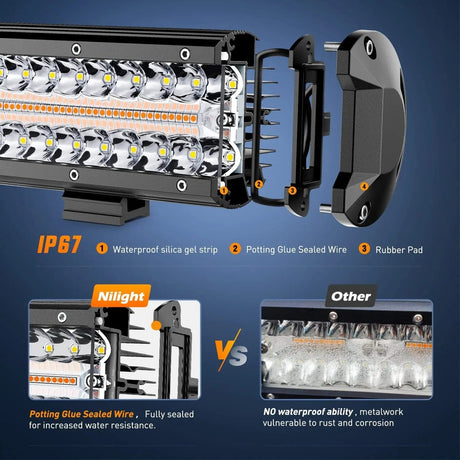
12 Inch 300W Amber White Led Light Bar Kit | 2PCS 4 Inch 60W Light Pods | 16AWG Wire
$85.99Unit price /Unavailable -
Media grid
View All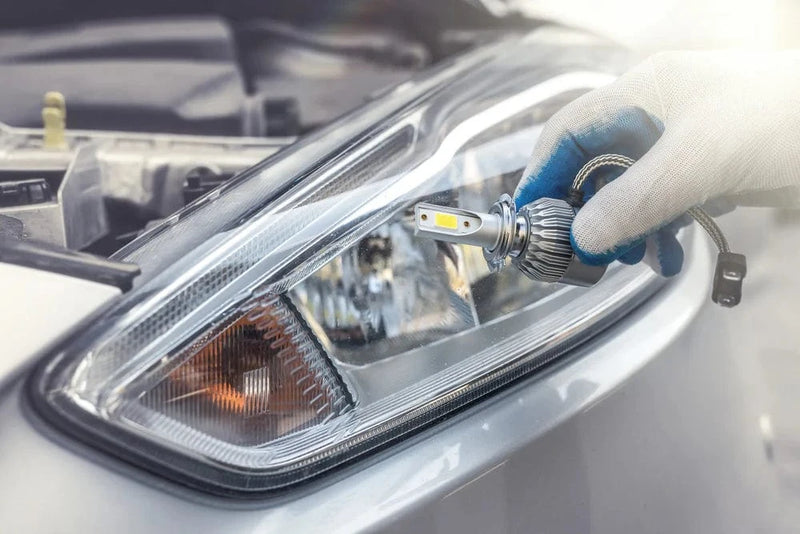

Help & Advice
Shipping
What countries do you ship to?
What countries do you ship to?
We currently ship to the United States, Canada, Australia and the UK. To enquire about shipping to a different destination, please contact us.
How long will it take to receive my order?
How long will it take to receive my order?
Standard shipping normally takes 3-5 days. Next day shipping is available on all domestic orders (for an additional charge). International shipping times depend on the products and destination (estimated at checkout).
Returns and Refunds
How do I return a product?
How do I return a product?
Items must be returned within 30 days after receiving your order. Items must be returned in the same condition in which they were received, be unworn/unused, have any tags still attached, and include all the original packaging.
How long will it take to receive my refund?
How long will it take to receive my refund?
Refunds are processed within 7 days from when we receive the item(s).


